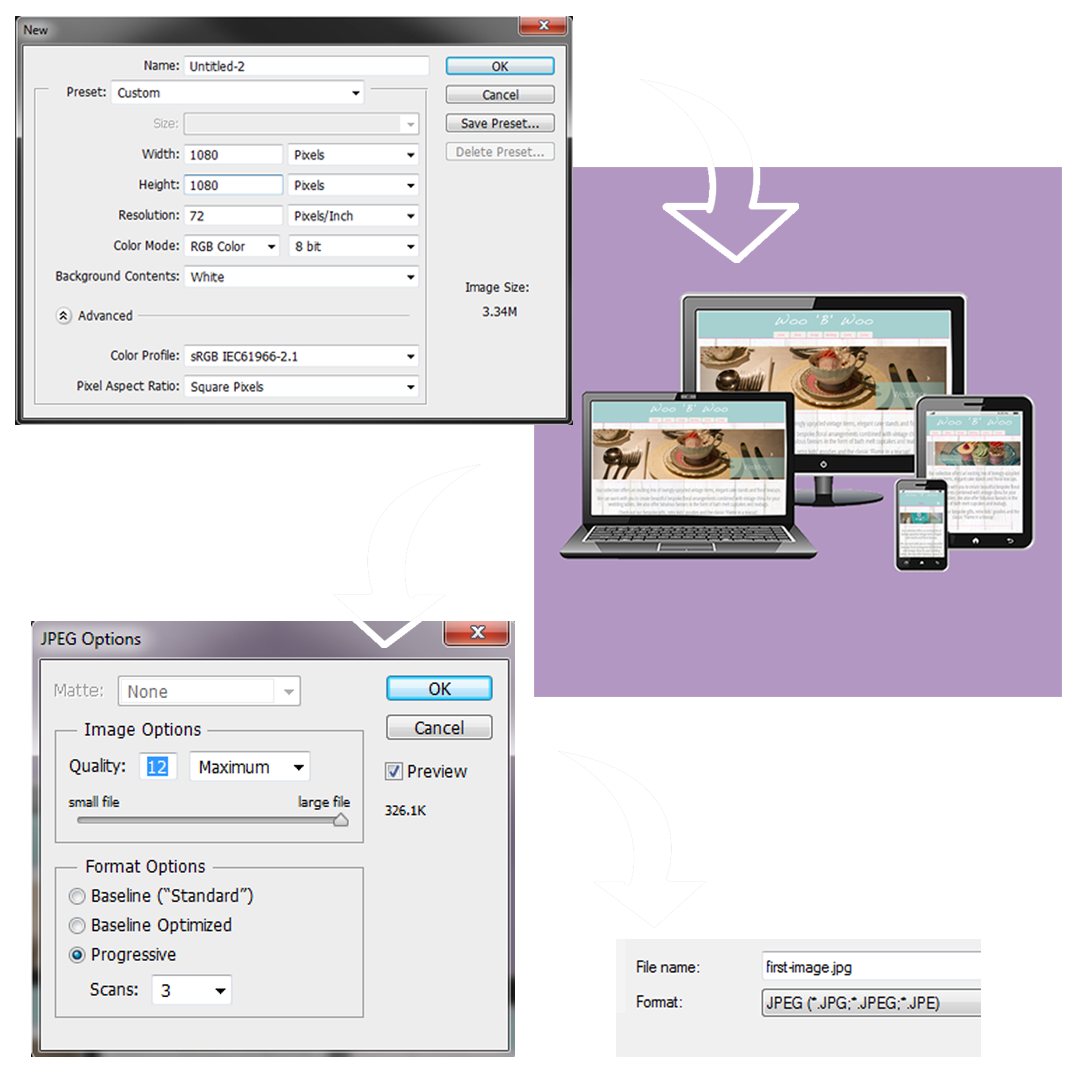
• Create a new canvas - The dimensions need to be square, and setting them at 1080 pixels on each side ensures that the image will display well on desktops as well as scaling down for smartphones and tablets.
• Save each image as a JPEG or PNG
Tip
Remember, you only have 6 seconds (6.5 actually, but we'll cover that later) so less is more. You want each image to stay on screen long enough to register as more than just a blur. This video was made using a total of 9 images, but you can add more images for less screen time each, or remove images for more screen time.
Click to navigate between steps
• Open Windows Live Movie Maker, create a new video project and add each image
• Set the time for each image so that the total video lenth is 6.5 seconds.
• Click 'Save Movie' and then Create Custom Settings, setting the width and height to 1080px
• Save, close and then click Save Movie again. This time, your custom setting will appear in the bottom section. Click it.
Tip
When I created a video that was 6 seconds in total, I ended up with a half second flash of black as the video looped in the Vine app. I extended the total length of the video to 6.5 seconds and it looped seamlessly. Each portfolio item appears for 0.6 seconds, and the final slide appears for 1.7 seconds.
• Open Handbrake and select the video file you made in Step 2 as the source
• Enter a destination folder and ensure the video is displaying as 1080px x 1080px MP4
• Click start, and the video file will convert
Tip
It's best to give the new video a separate title than the one created earlier. This will ensure that if you experience any issues you can pick up part way through the process rather than starting again.
• Copy the final MP4 video file to your device
• Open the Vine App
• Upload the video by following the in app instructions
Tip
You can preview your video during the upload process. This is handy to ensure it's looking as it should before you publish it.